A Step-by-Step Guide to Properly Tacking Your Horse
The phrase "tacking up a horse" is a basic phrase known among the horse riding community. However, if you’re a new rider, you might need clarification with the new terms.
Horse tacking is an essential skill any horse owner or rider must possess. Not only does it ensure that you and the horse are comfortable and safe while riding, but it is also a sign of respect for the animal. Taking the time to learn how to tack up a horse properly can help reduce the risk of injury for you and your horse.
What exactly is tacking up a horse, and hw do you do it correctly? In this article, you will discover the step-by-step guide to tack up a horse and what equipment you will need.
What Is a Horse Tack?
Horse tack is a term used to describe all equipment used to ride, handle and care for domesticated horses. The phrase "tacking up" means placing all riding equipment on the animal and ensuring that each item is secured correctly. On the other hand, when you are instructed to "untack a horse," you must remove all equipment from the horse and place everything inside the tack room, which is just an area where your horse tack is stored.
Every piece of tack equipment offers comfort to the animal and its rider, making it a crucial part of forming a solid bond with your horse.
Standard Pieces of Horse Tack Equipment
As your experience in horse riding increases, so does your familiarity with horse tack. Nonetheless, it can be challenging for a novice to buy the correct items, mainly if it is their initial purchase. Below, we list the most common pieces of horse tack so you'll be a well-informed shopper.
Saddle
A supportive structure for the horse rider fastened to the animal's back. Saddles come in all shapes and sizes depending on the discipline of the rider and horse.

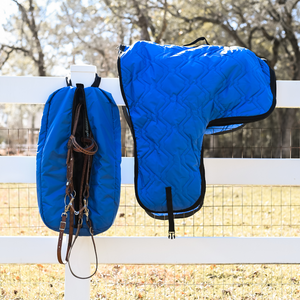
Saddle Pad

Cinch/Girth

Bridle

Headstall

Bit

Reins

Boots

Bell Boots

Other useful horse accessories include stirrups, breast collars, and curb chains. However, only some pieces of equipment on this list are required for every ride, so have your horse tacked up based on the kind of activities you plan to do.
How to Tack Up a Horse
Proper tacking is essential for safe horseback riding. If the bridle is not fitted correctly, the rider may lack control over the horse. Similarly, incorrectly cinched saddles can cause the rider to fall off the horse or cause the horse to bolt, buck or rear up.
1. Prepare the Horse
Ideally, horseriders should fully groom the horse before placing the tack. This minimizes the likelihood of the animal getting saddle sores caused by dirt or loose hair. Grooming includes brushing the horses body and picking out mud or any debris from the hooves. Preparing before tacking up a horse also allows you to inspect for any bumps or swelling on its body, which are signs that it is unfit to ride.
2. Place the Saddle Pad on the Horse's Back
Behind the high point of the horse's shoulders, called the withers, carefully place the saddle pad. Saddle pads will vary in sizes and types depending on the type of saddle used and the preference of the horse.
3. Position the Saddle on Top of the Pad
Gently place the saddle on top of the pad. It should sit in the middle of the blanket. Then, make the necessary adjustments to ensure that the animal is comfortable with the placement.
4. Fasten the Horse's Girth
The next important step in tacking up a horse is carefully attaching the girth. The saddle is fastened under the horse's body with a cinch or girth strap. Start with connecting the girth to the saddle's right-hand side before pulling it under the animal's body to secure it to the left side.
5. Place the Bridle
As mentioned above, the bridle is composed mainly of three components. The bit should be the first one to be attached. Offer it to the horse's mouth. If it does not take a bit, you can put your thumb in the corners of the animal's mouth and gently push against the tongue. Be very careful not to hit their teeth.
Next, place the headstall over the horse's ears. Again, be careful not to handle the ears aggressively while sliding the piece over the animal's head. When placed appropriately, the headstall should be behind the ears and the browband in front of the ears. Other common headstall types are single ear and split ear.
Lastly, attach the reins on to the bit. Some reins will have two clips, while other reins may only have one clip with a leather tied bit loop.
6. Wrap Your Horse's Legs
Before wrapping the legs:
- Ensure the area is dry and clean. The wrap should start below the horse's knee and cover the ankles and cannon bones.
- If using rubber bell boots, take the bell boots and flip the material inside out so it will be easier to slide the footwear over the hoof. If using velcro bell boots, insure the boot is fastened snug.
7. Double-Check All Equipment
When you tack up a horse, the final step is to double-check everything. Perform a visual inspection of both sides to guarantee that the saddle pad is not bunched. Then, confirm that the bridle does not hinder both ears and re-examine the tightness of every strap and clasp.


